C4D酒店制作教程
这个教程最关键在于后期。三维方面不管是C4D 还是MAYA 或者MAX都是很容易达到的 思路还是最重要的 希望小伙伴们看完有一定的了解领悟

先来看看PS后期制作过视频程解析吧
Concept References(概念与参考资料)
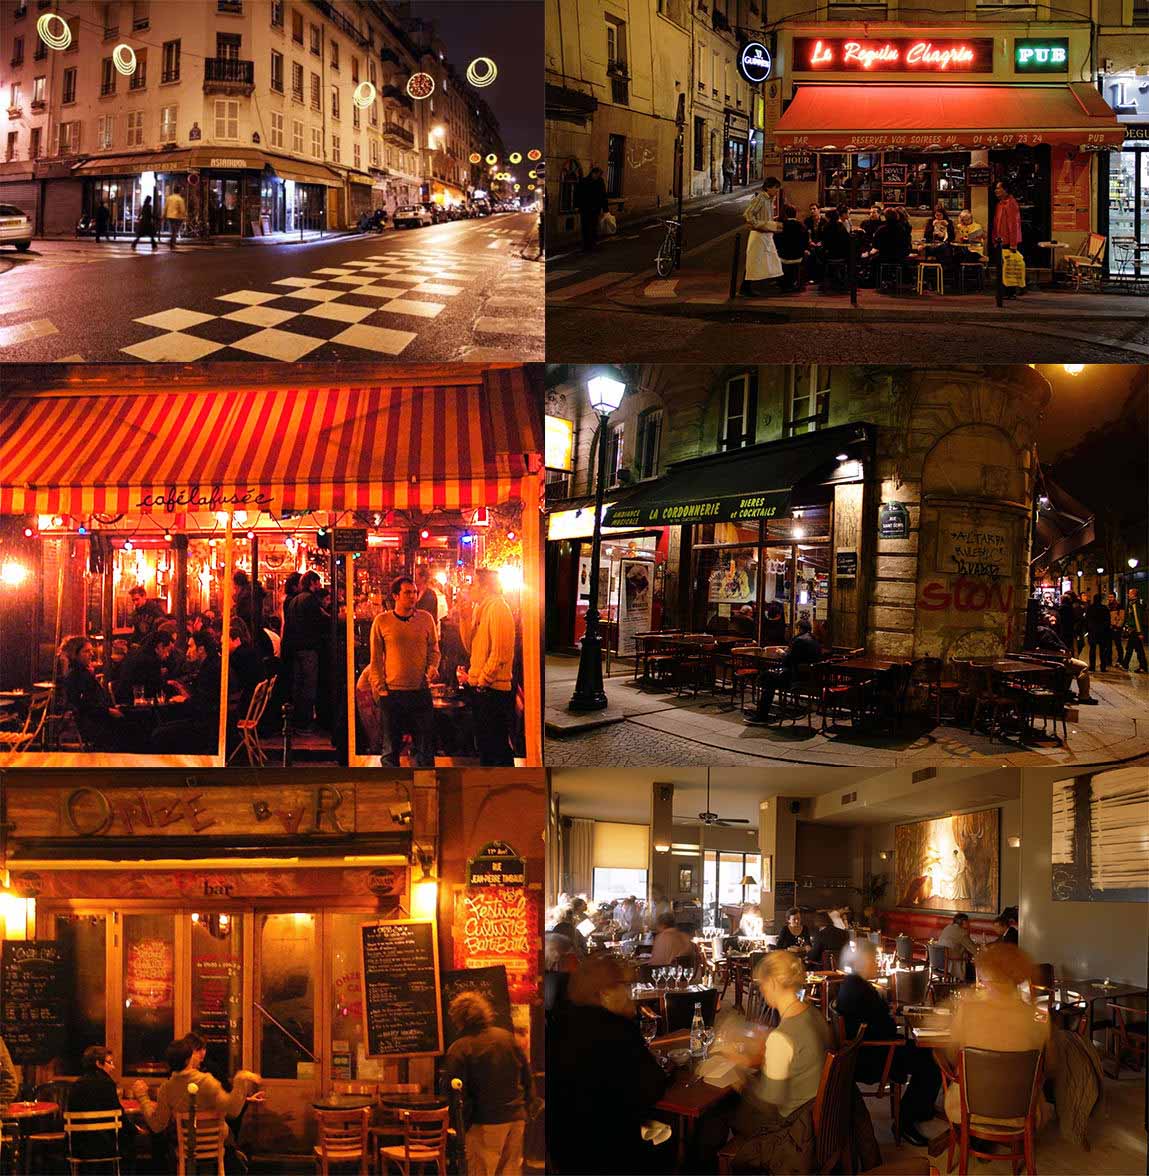
一个项目开始,主要是先收集参考图片和素材。
我将花一些篇幅解释一下渲染的过程。
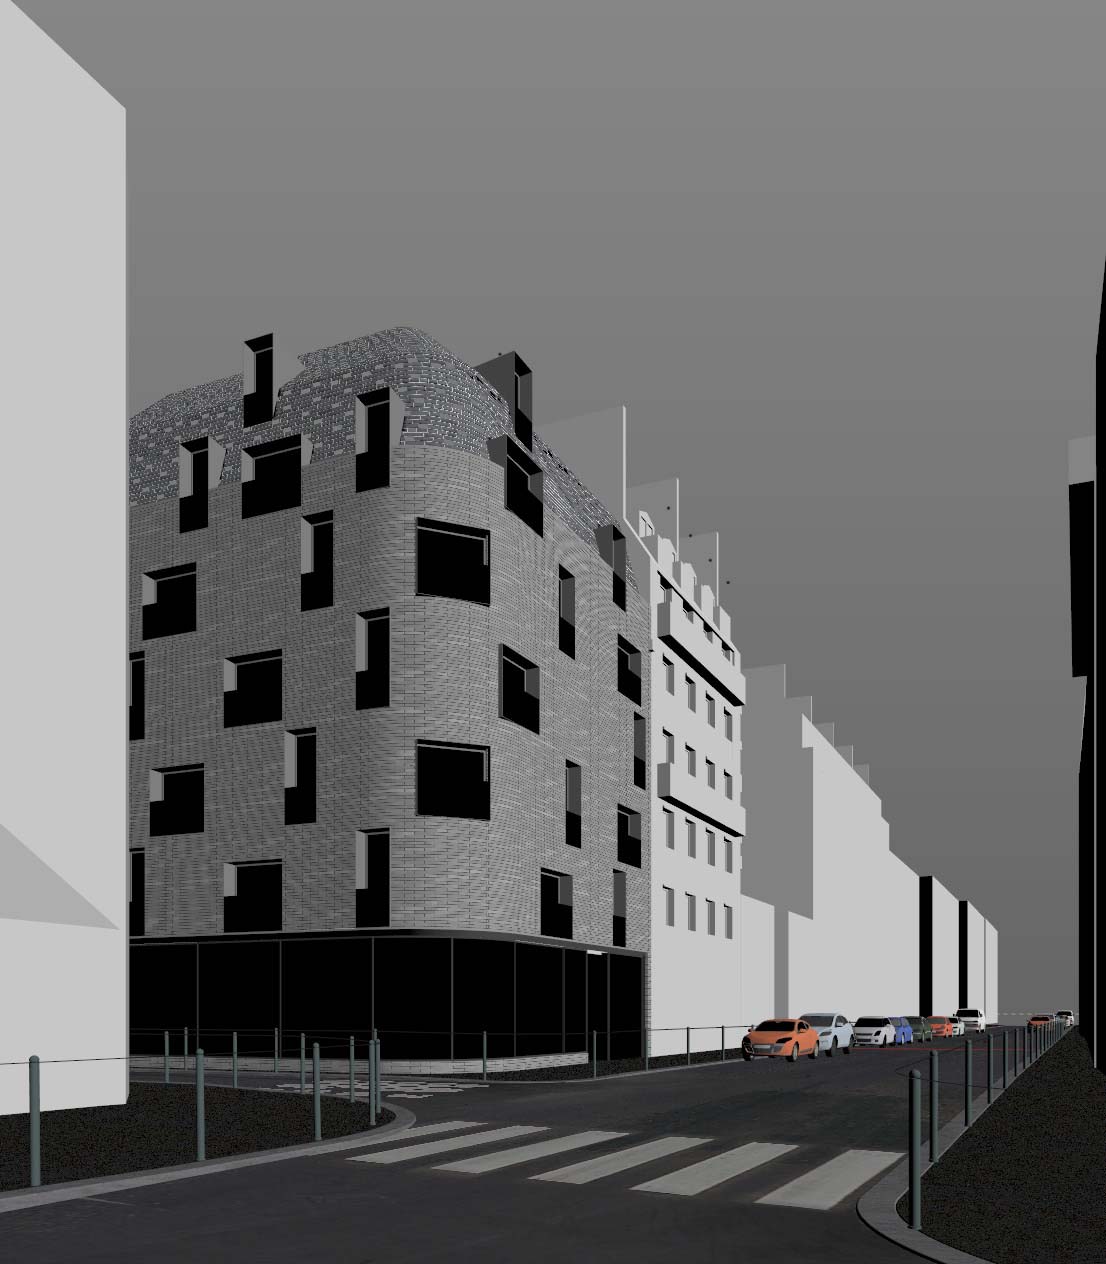
3D Modeling(c4d建立模型)
大多数的模型是我的设计团队完成的。街道、人行道、内部和外观上的一些调整是我唯一不得不做的。
模型并没什么特别的。所有建模在C4D完成。这里你看到的视窗模式。
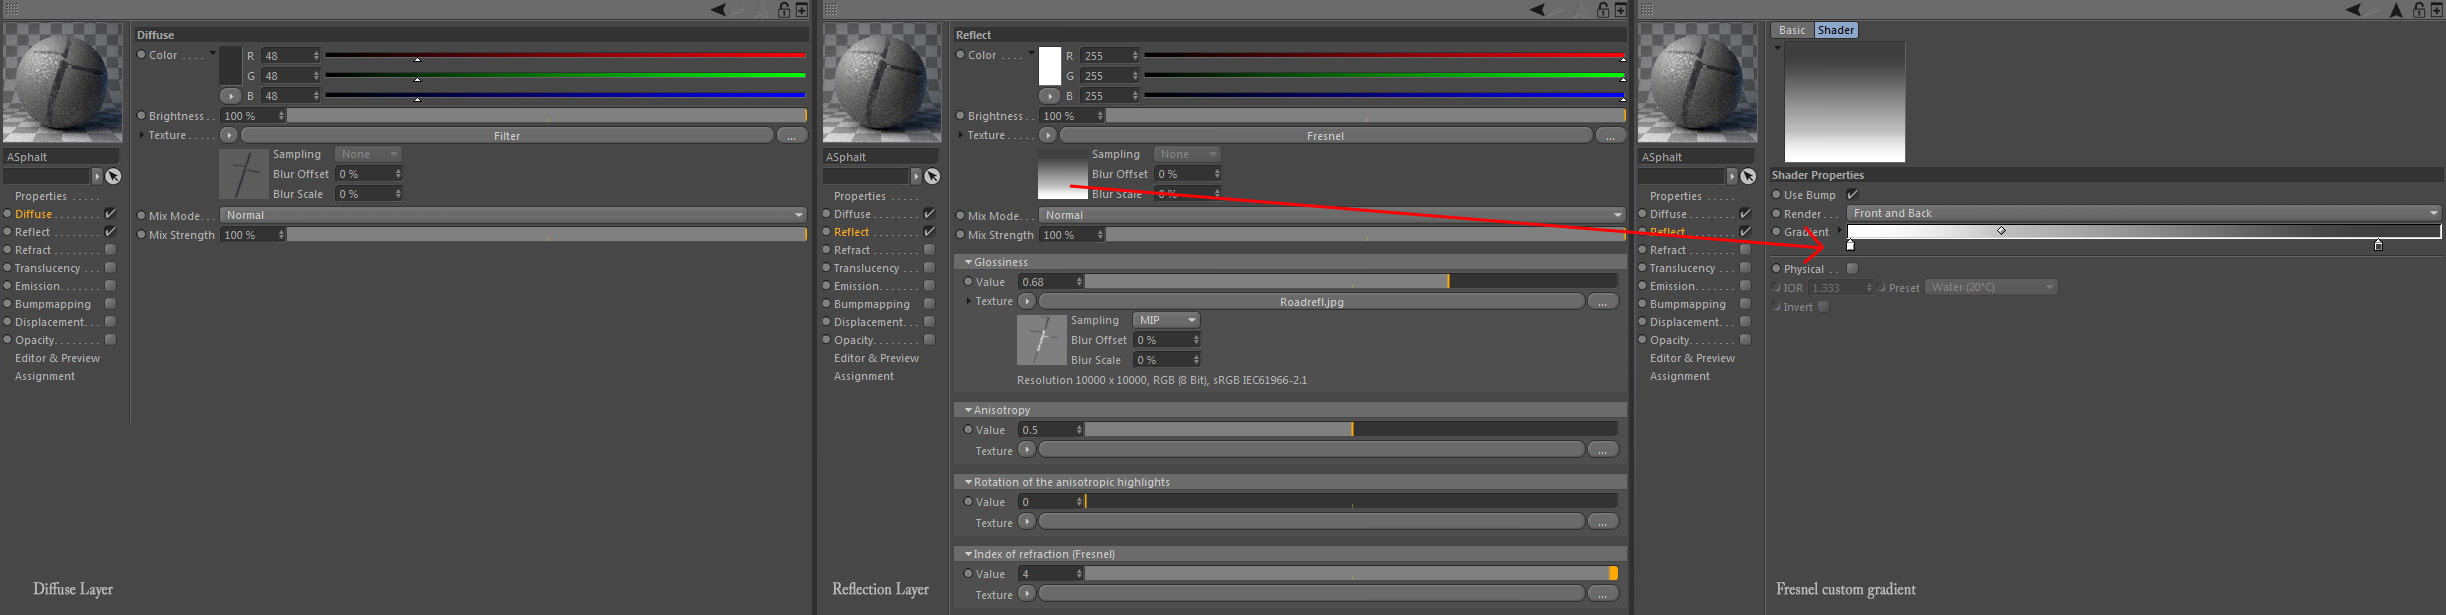
材质,纹理和材料
(没什么特别的,只给了反射贴图,作者的材质贴图是在CG Textures下载)
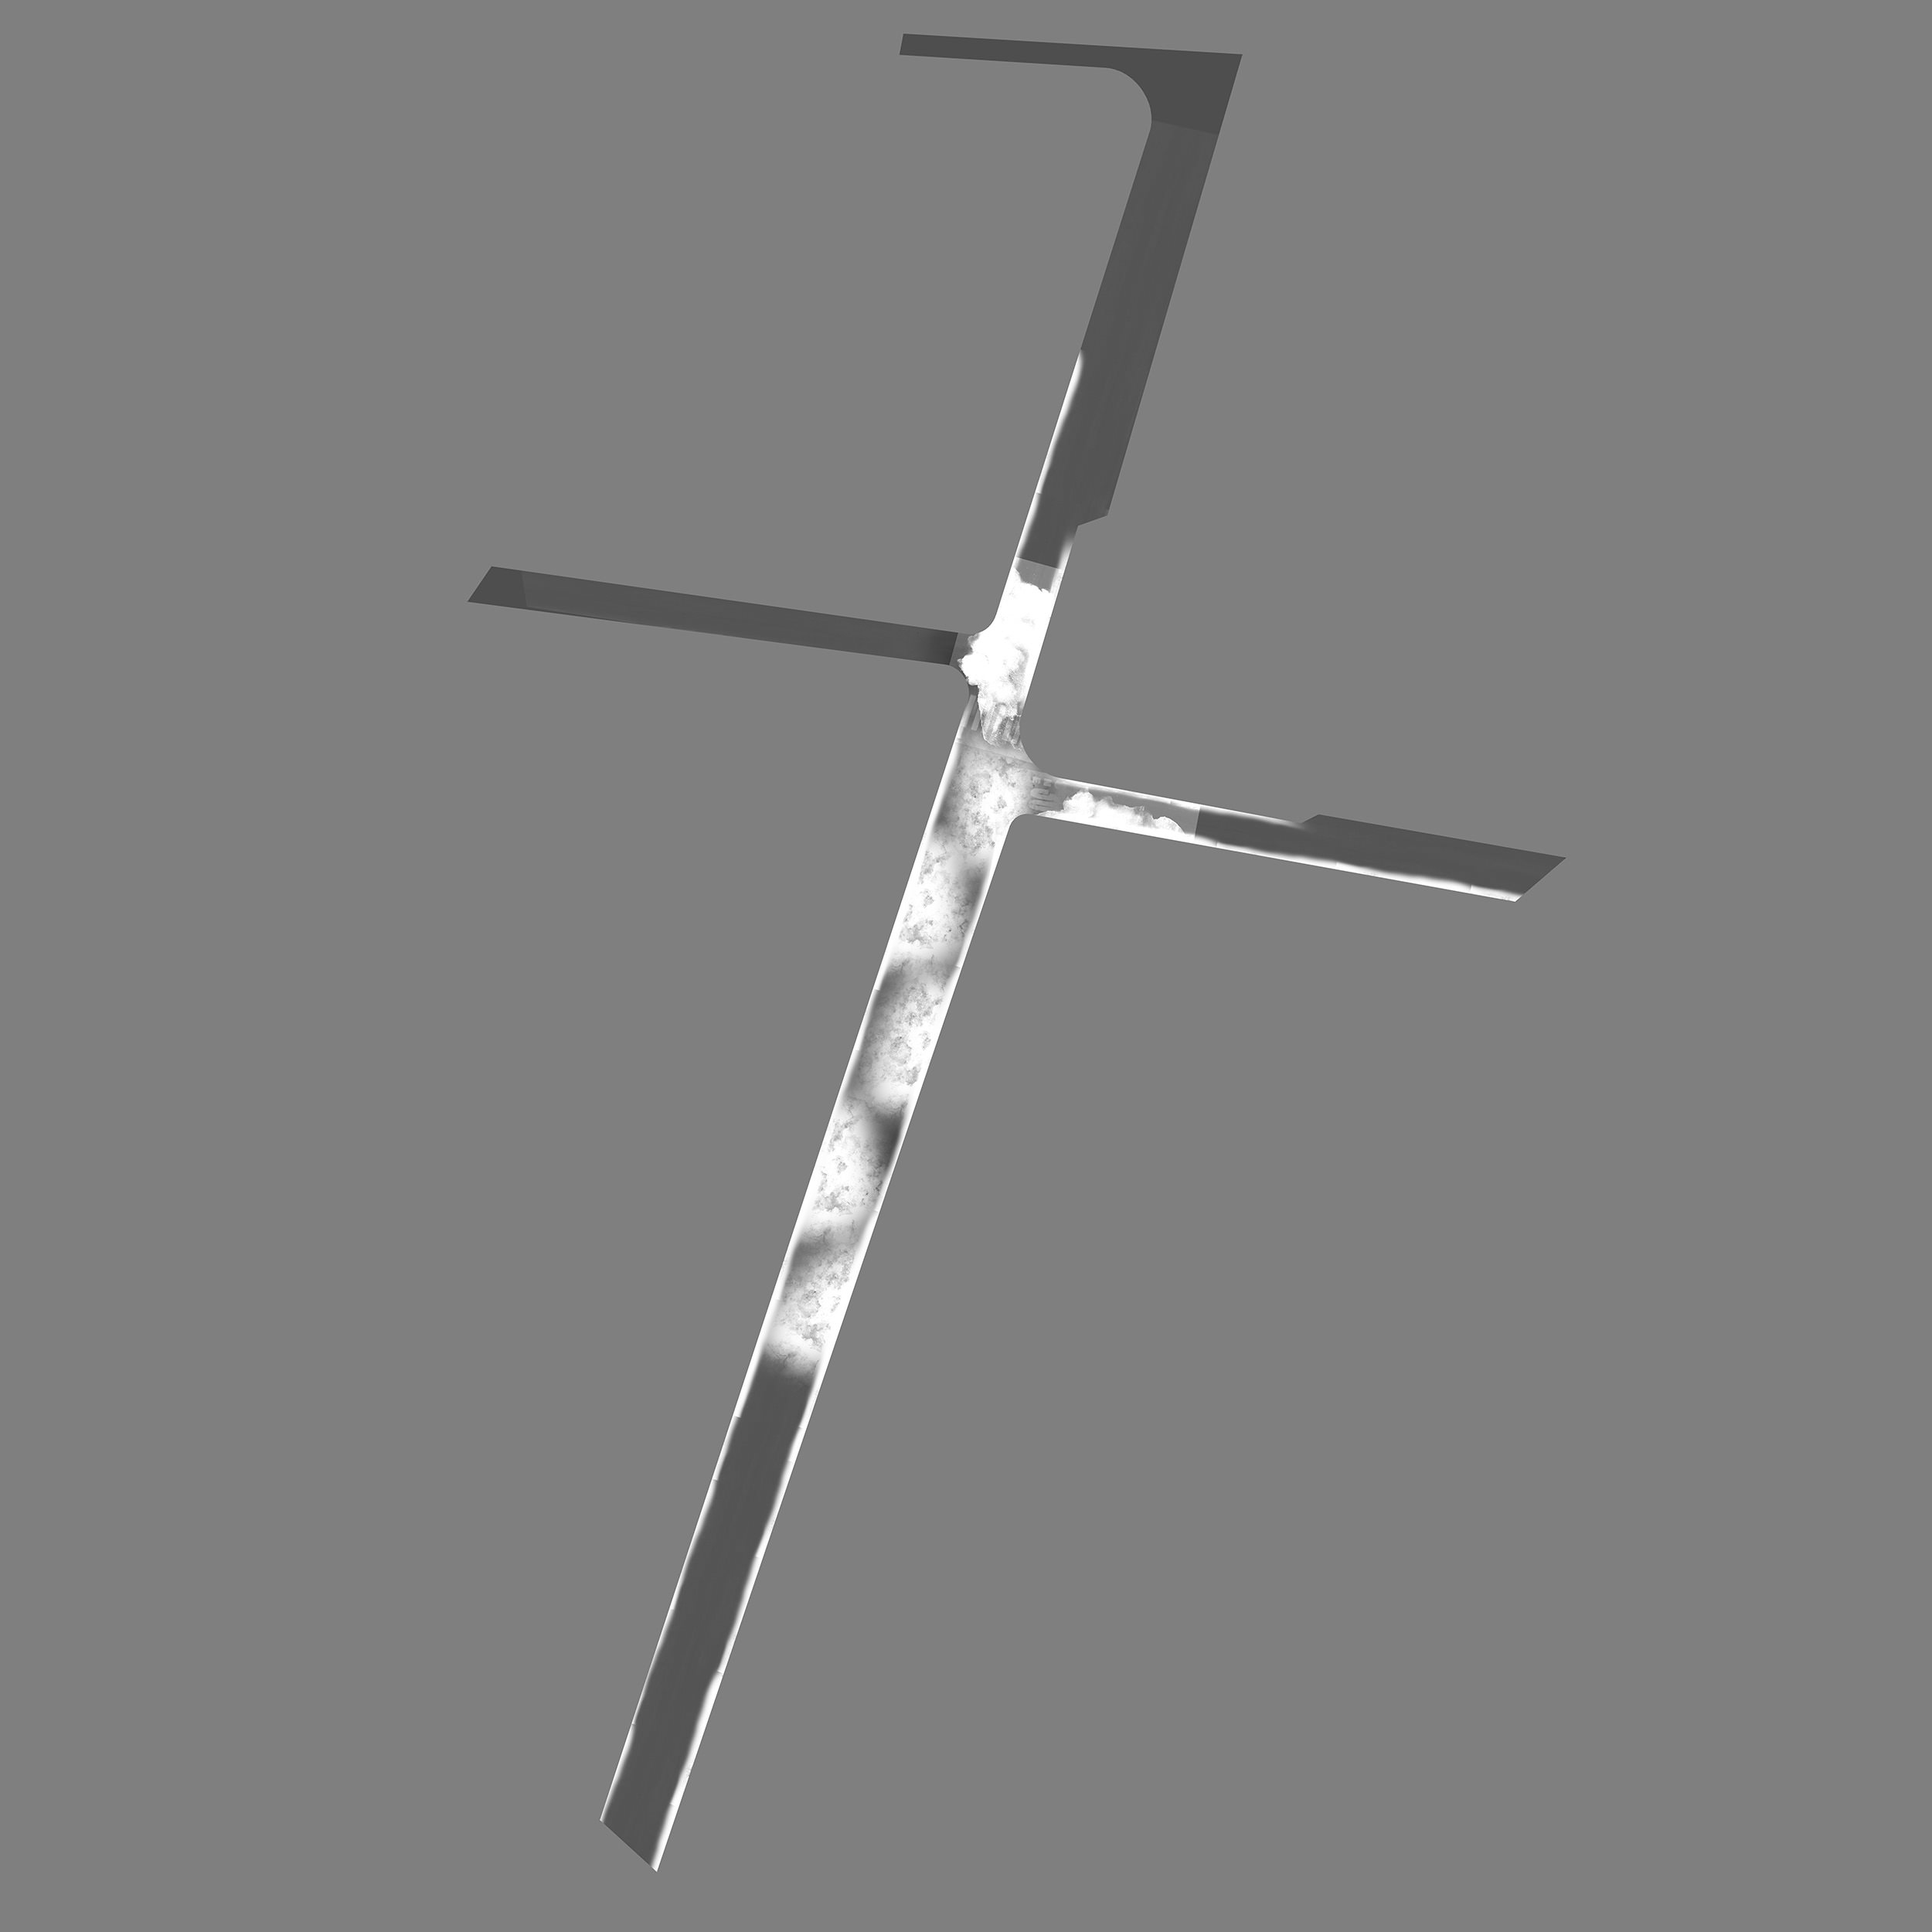
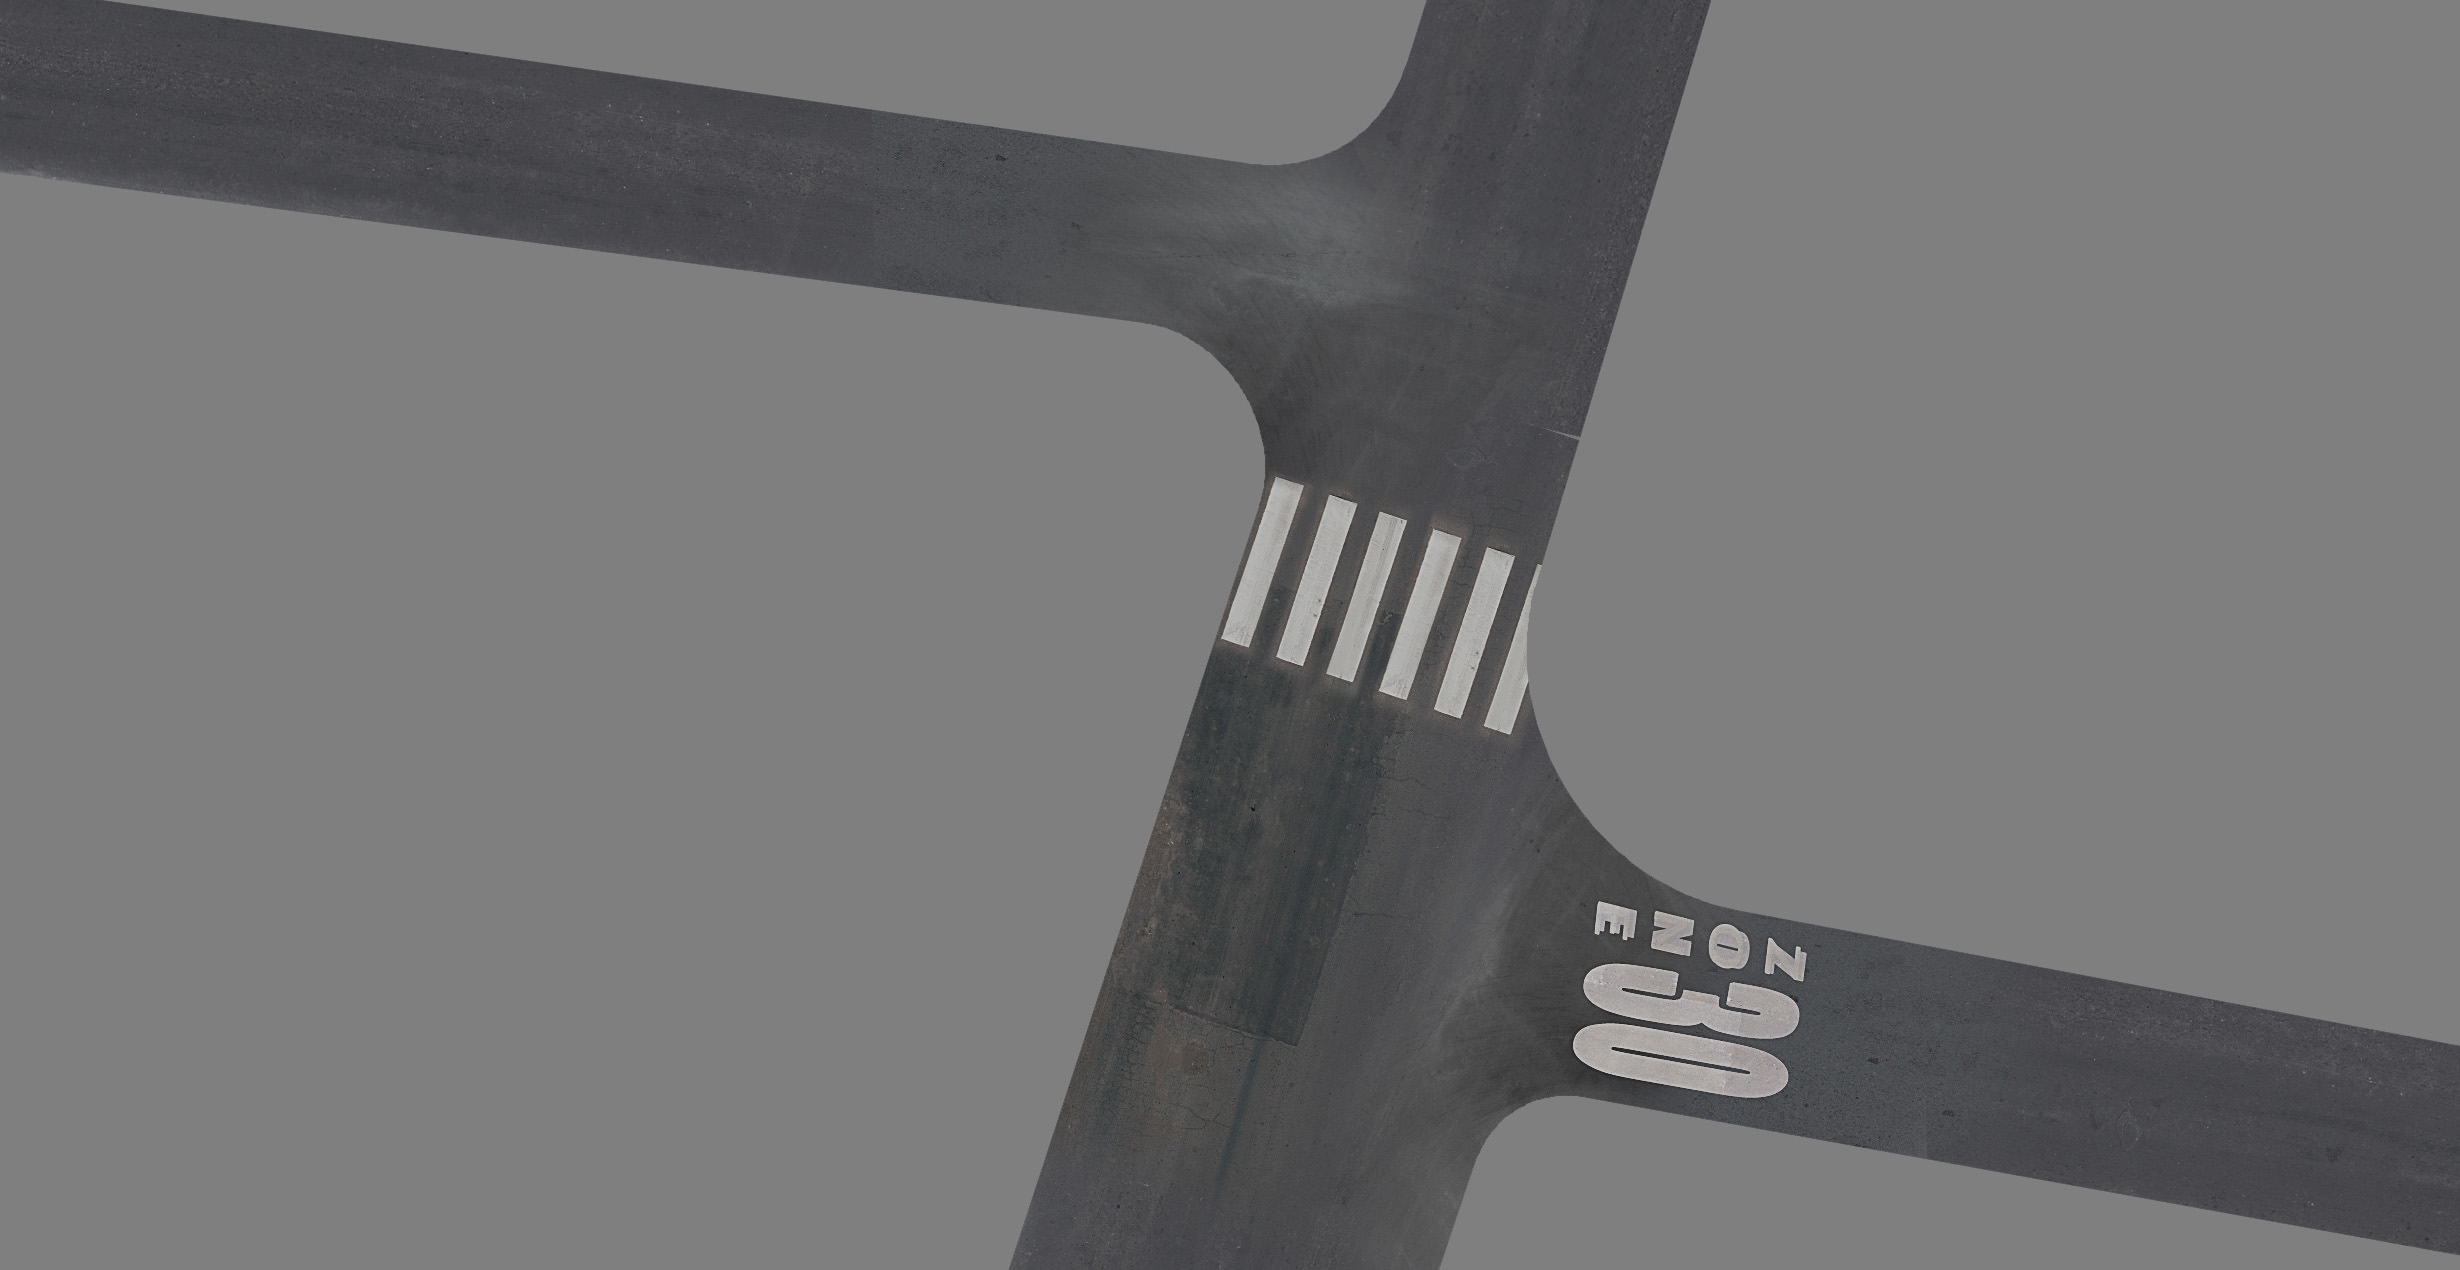
沥青材质
我唯一想要呈现的图像本身,是反映建筑及其所有的路和灯光尽量自然。所以,我不得不做出一个潮湿的道路。这样做在3DMAX里要容易得多。
很多贴图效果是定制笔刷刷出来的。基本map是反射贴图。

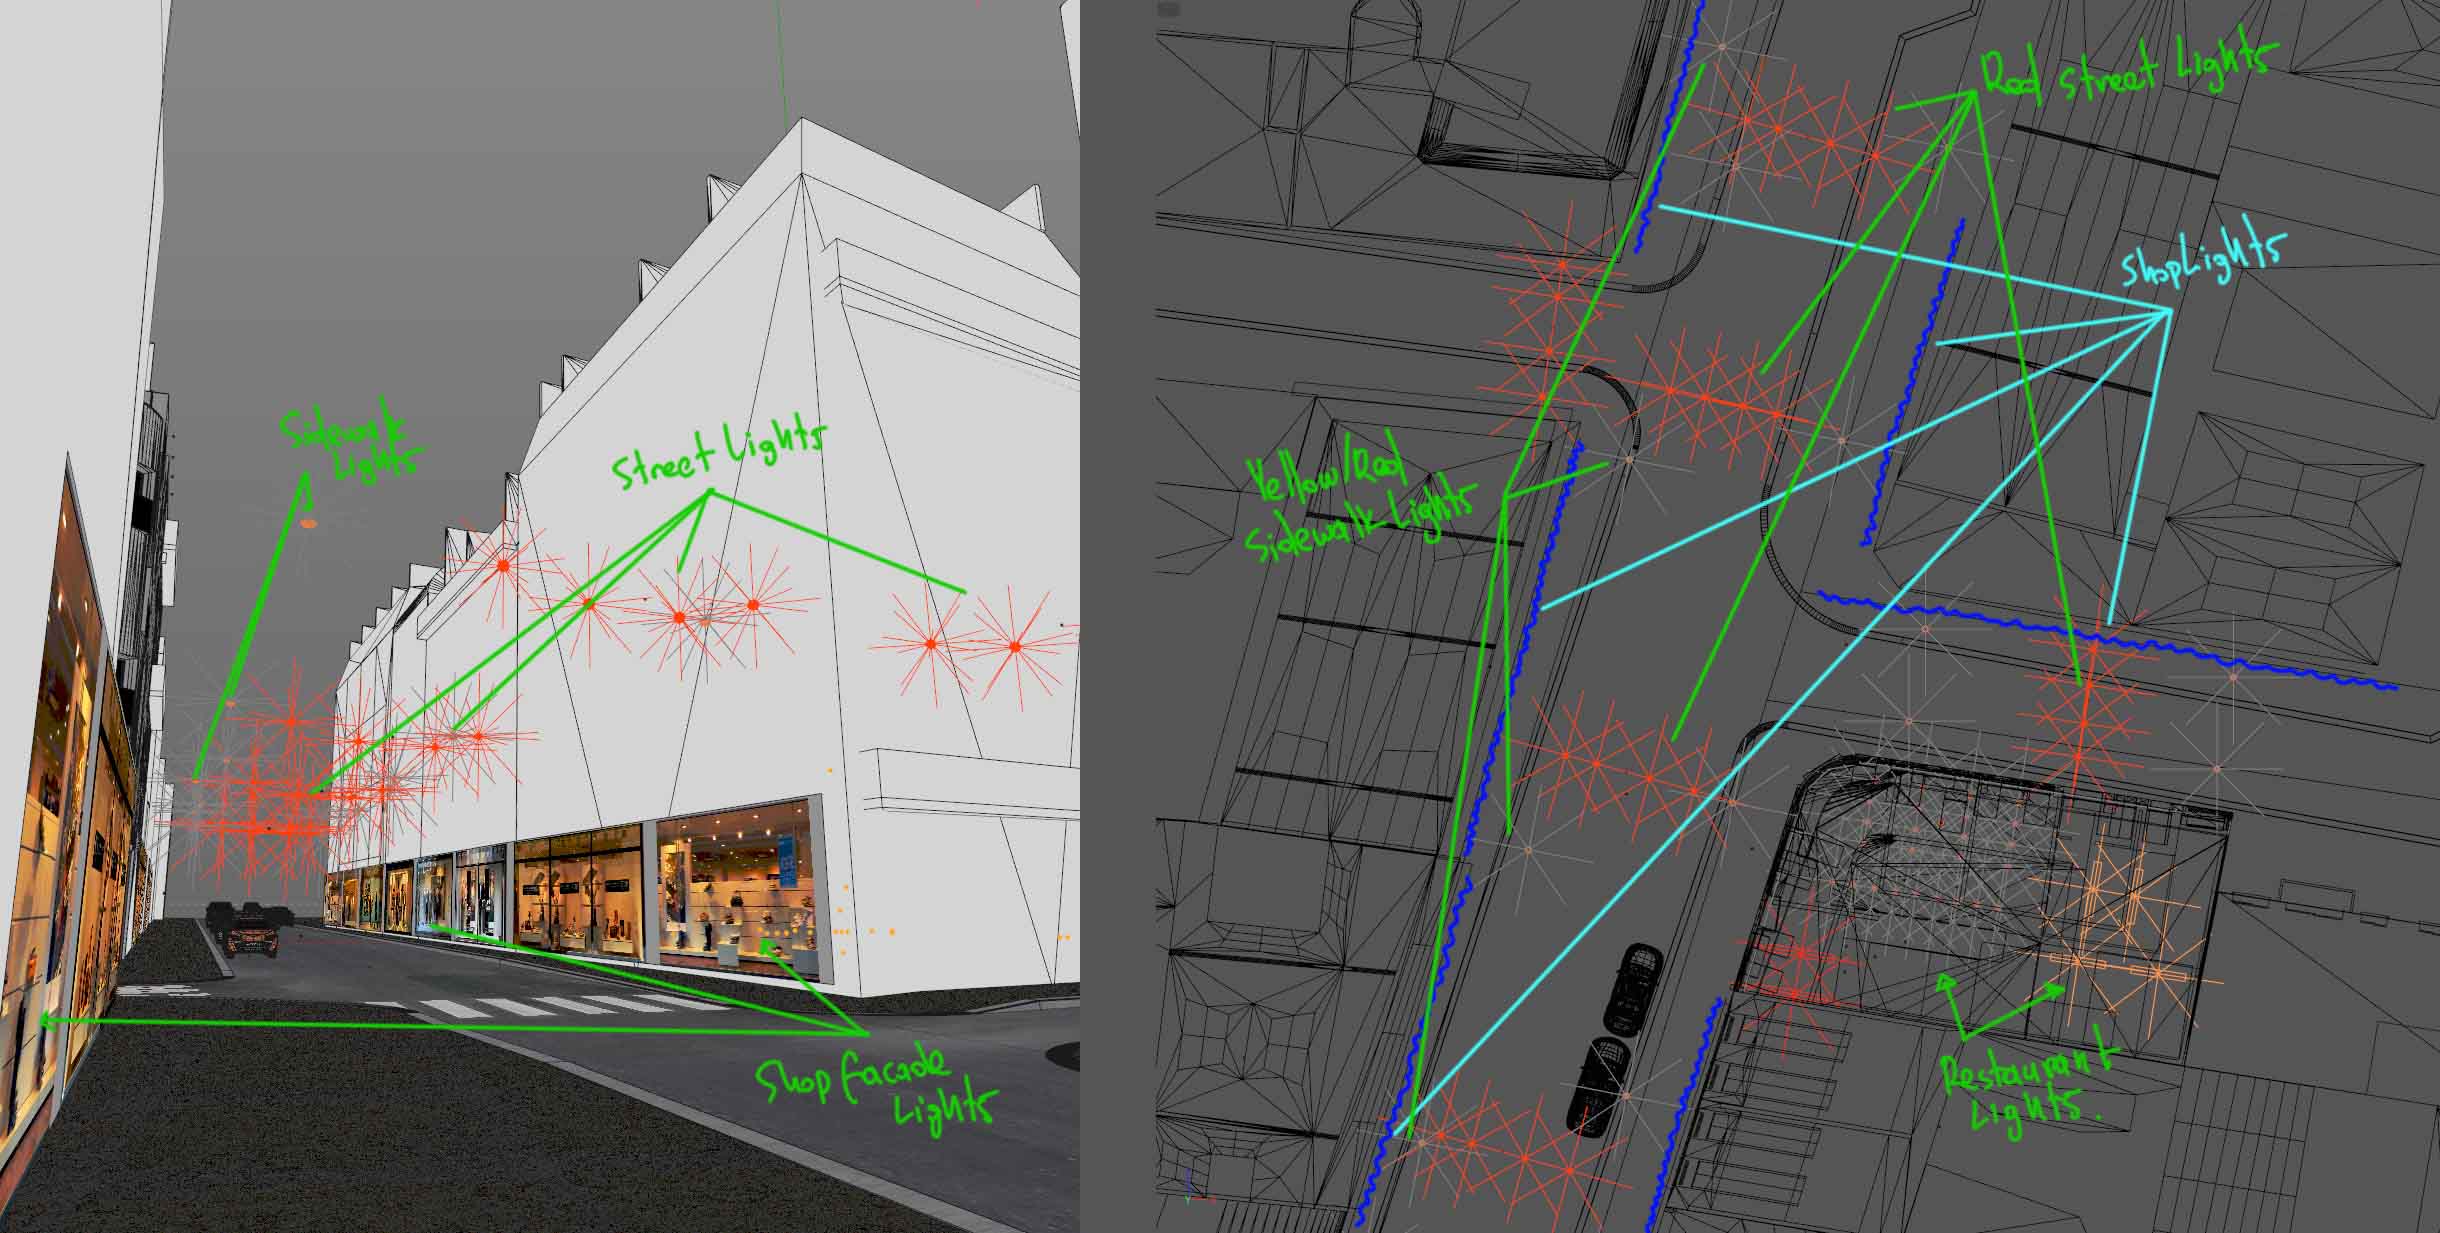
Lighting(灯光)Street Lights
最重要的是,照明!
总的来说,我更喜欢有一个随机/混乱放置光源,这样更真实。
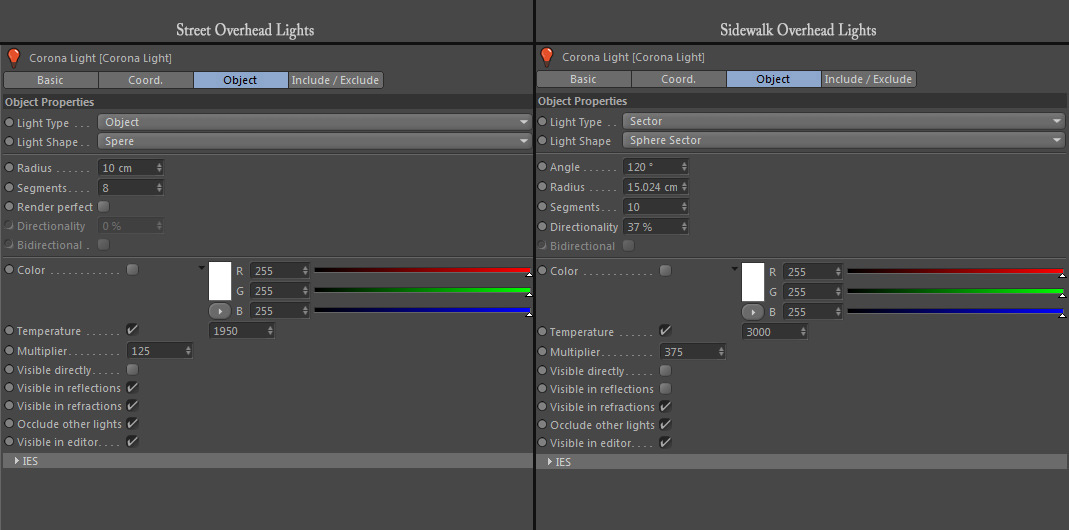
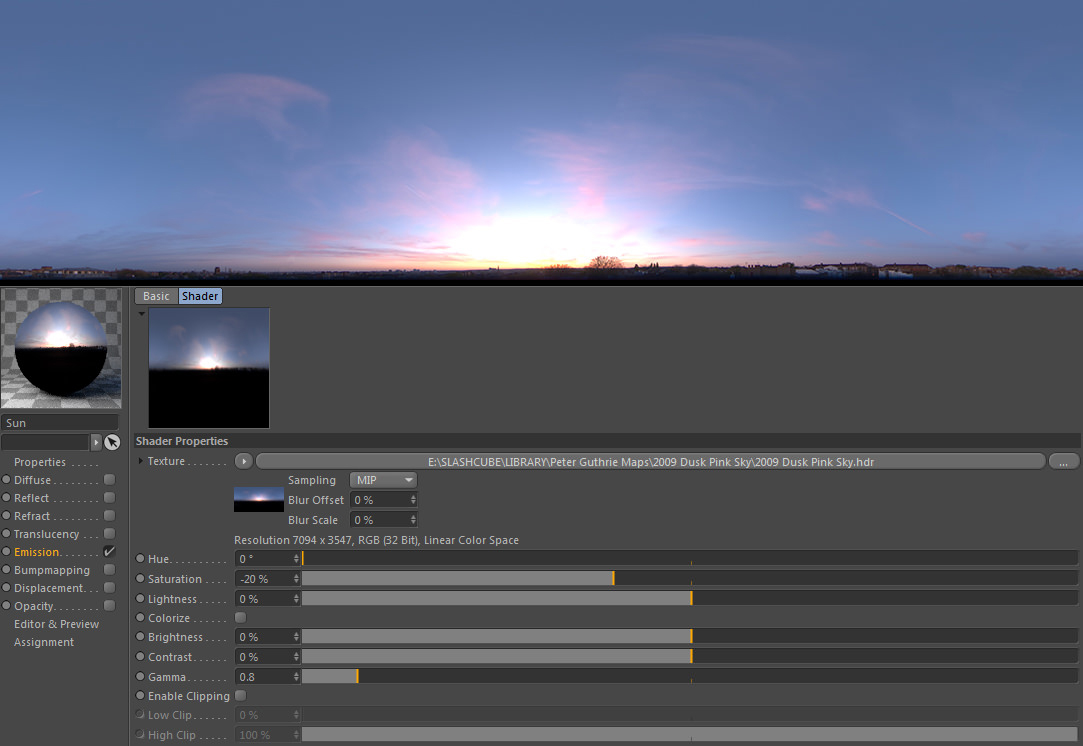
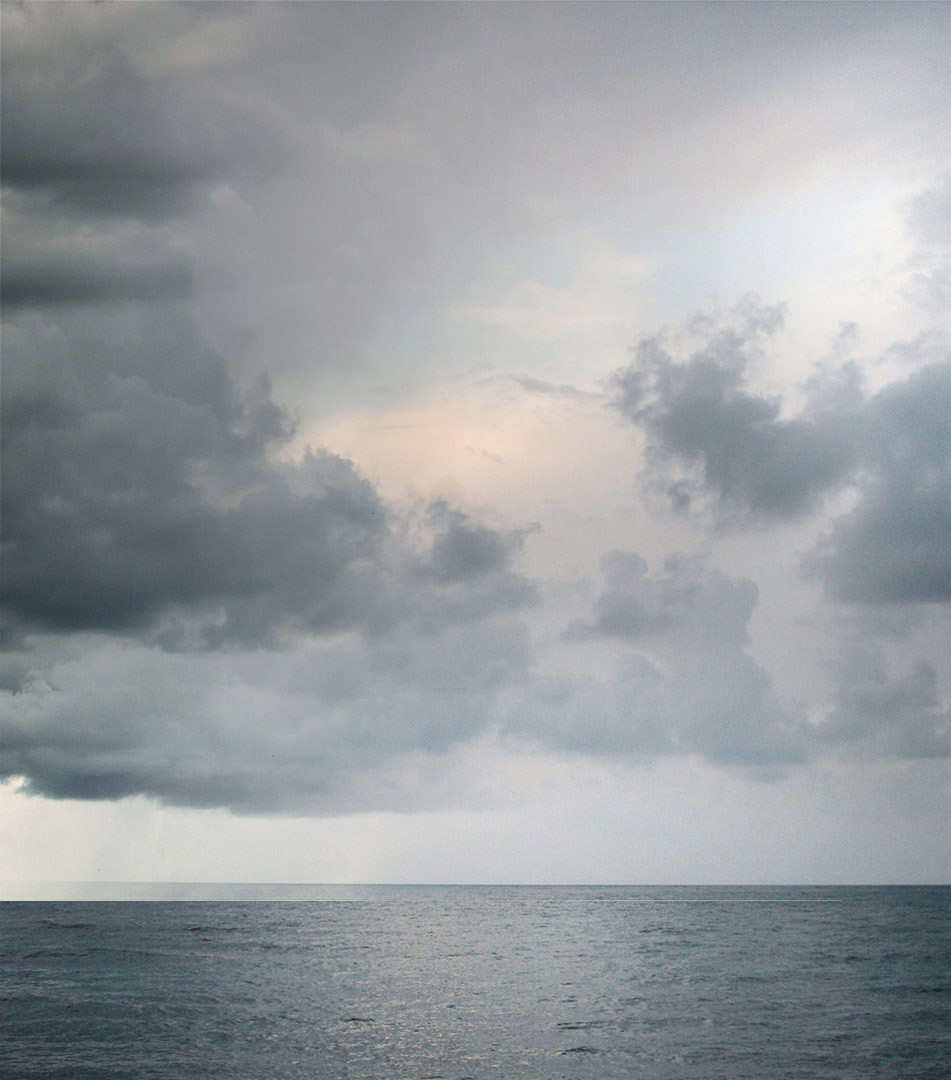
The Sky(天空)
主光源和我使用HDRI天空。光强度之间的完美平衡,天空色彩平衡
通常情况下,我也尝试降低一点的整体饱和度的天空。这样我也可以缓和夜空对我的口味。
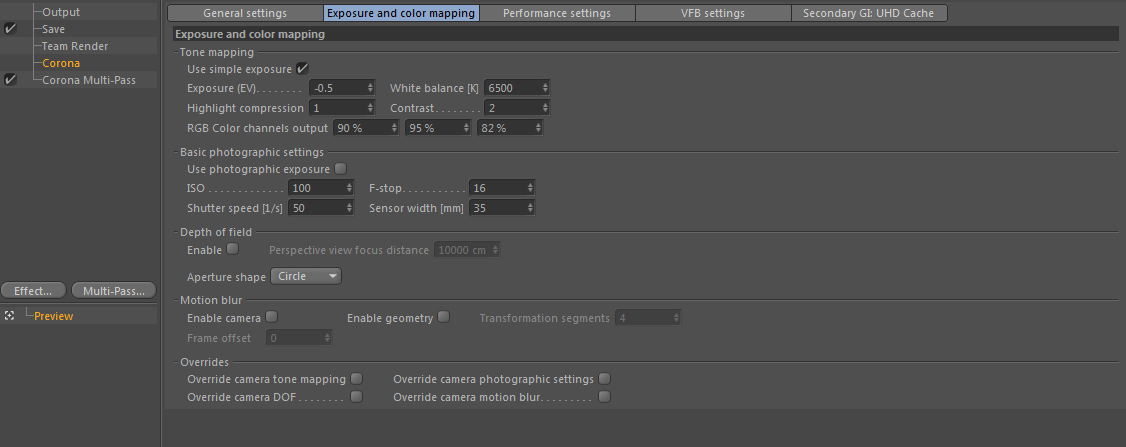
RENDERING(渲染输出设置)
Corona is quite easy on settings. I just keep the default settings.
The only thing I had to control was overall exposures and the highlight compression. But this is a project related issue, so it fits the needs of each project differently.
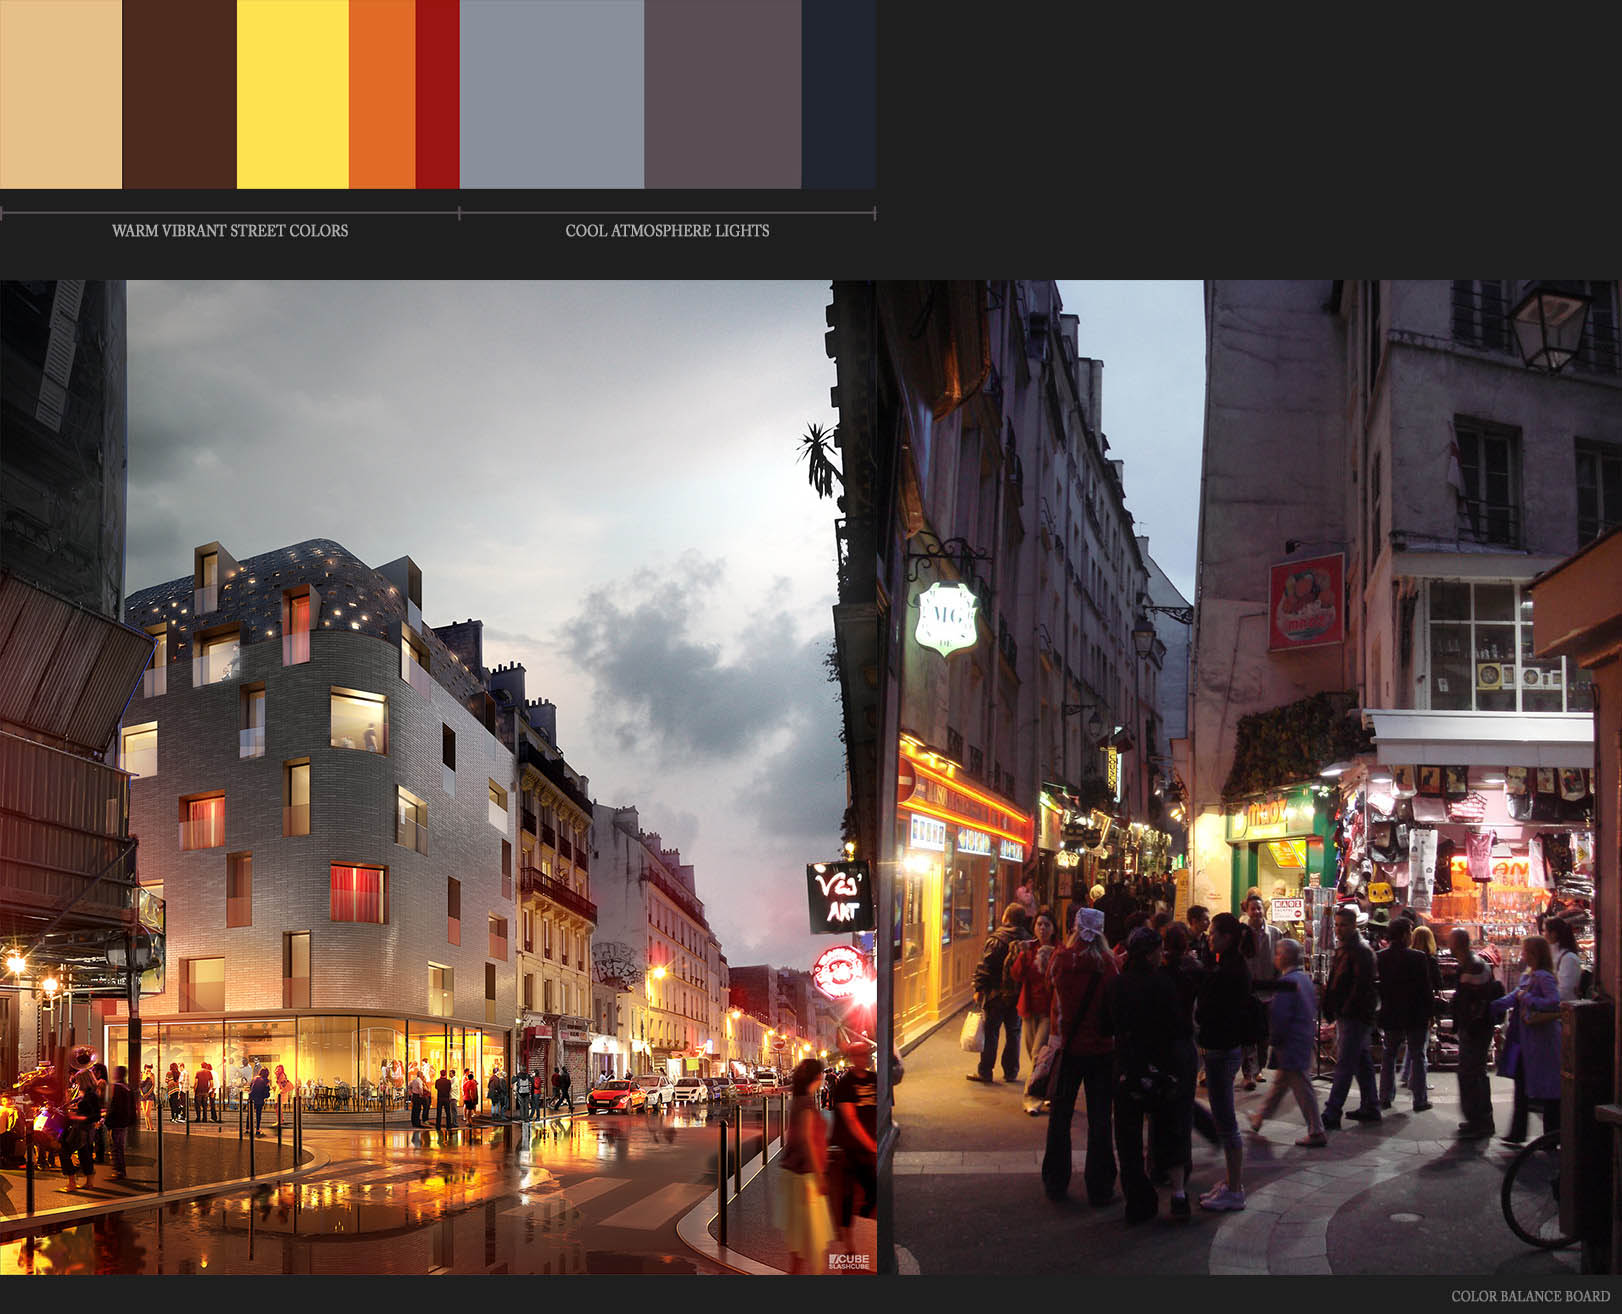
POST PROCESS(后期处理)Basic Value / Color Scheme
It all comes to this now. Most important is values and then colors. I always use a reference to compare my values and extract my colors from.
Sometimes it can be only one image as reference, other times it can be 2-3 images (like in this project). Using a black & white adjustment layer, I can check where my contrast is all the time.
So… I build a base for my contrast, using a reference and sometimes an early sketch. This way I know that my values will be exactly where I want them to be.
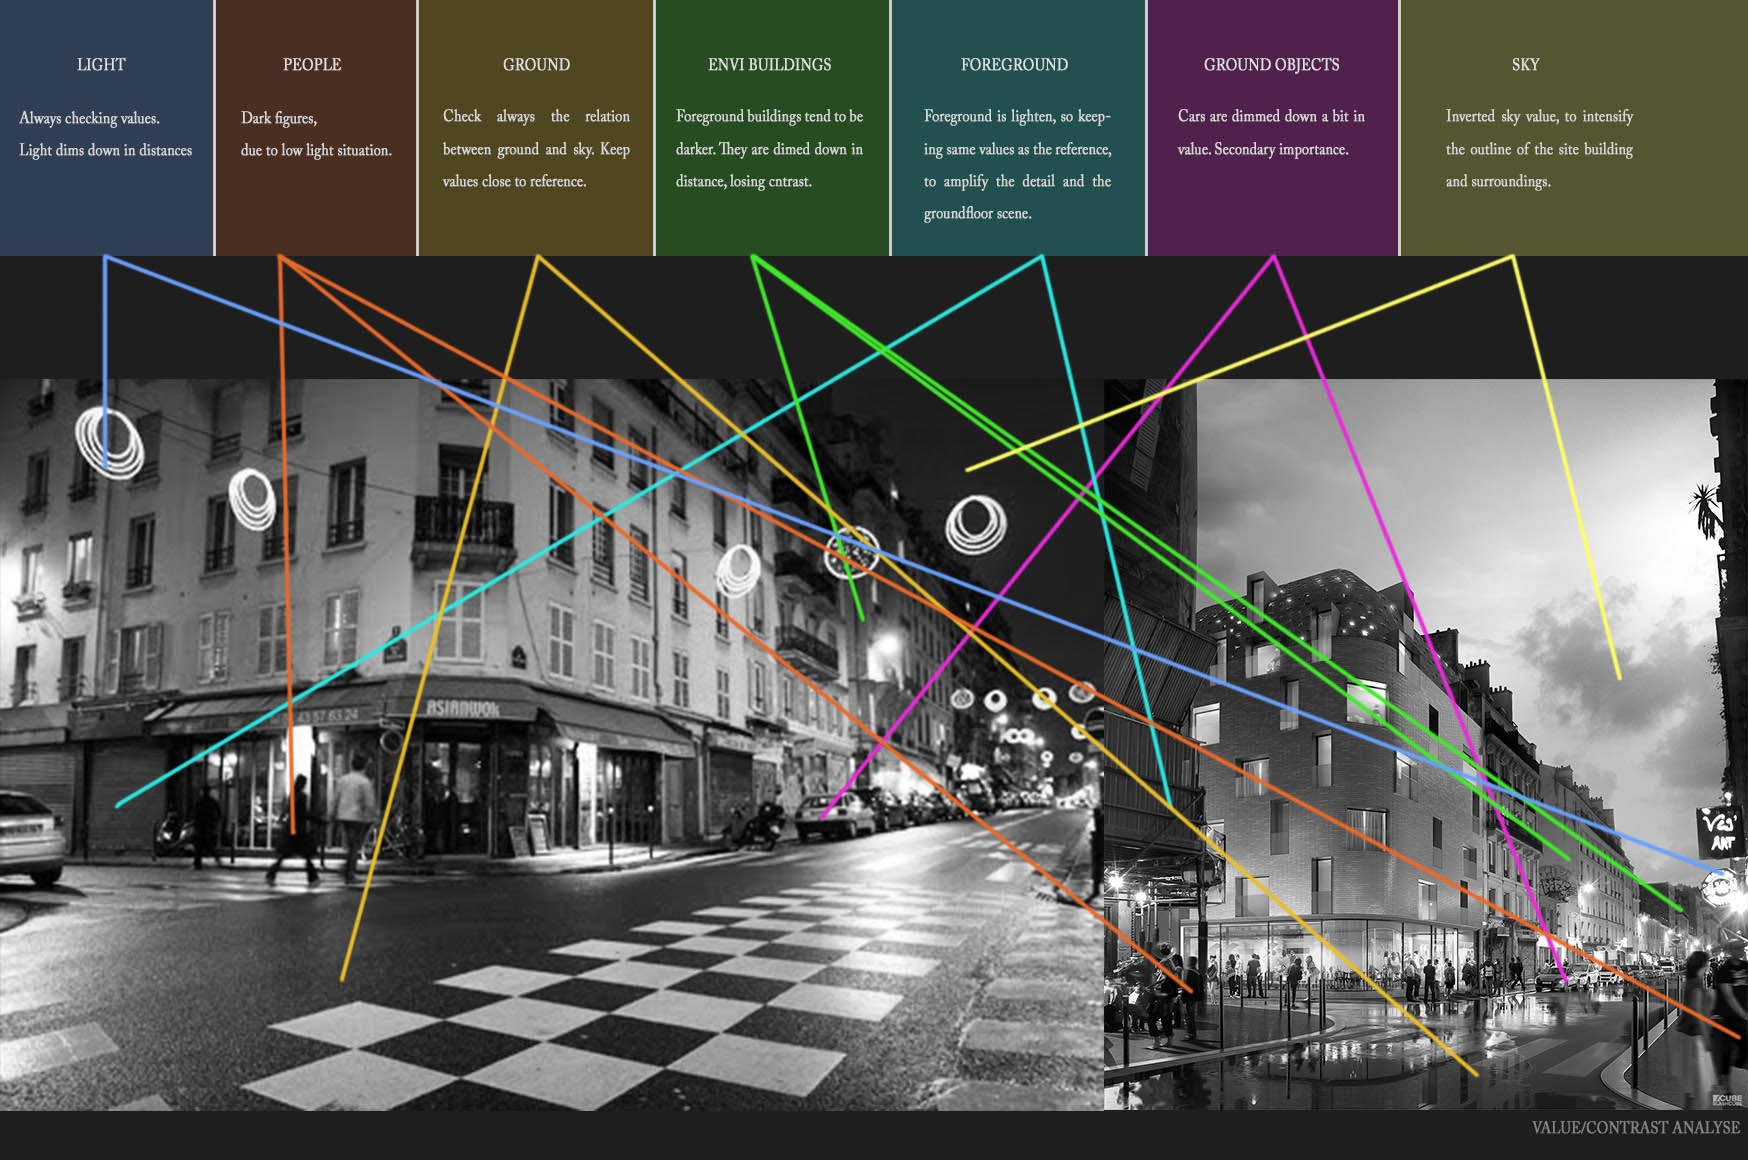
Color can come second inside the post process. If the values are solid, color can be controlled. Again, based on references, I can keep an eye on my colors, so that I don’t lose the sense I want to have in the end.
Constructing a basic color scheme is always important. Again, references are really important. So gather as much as possible!
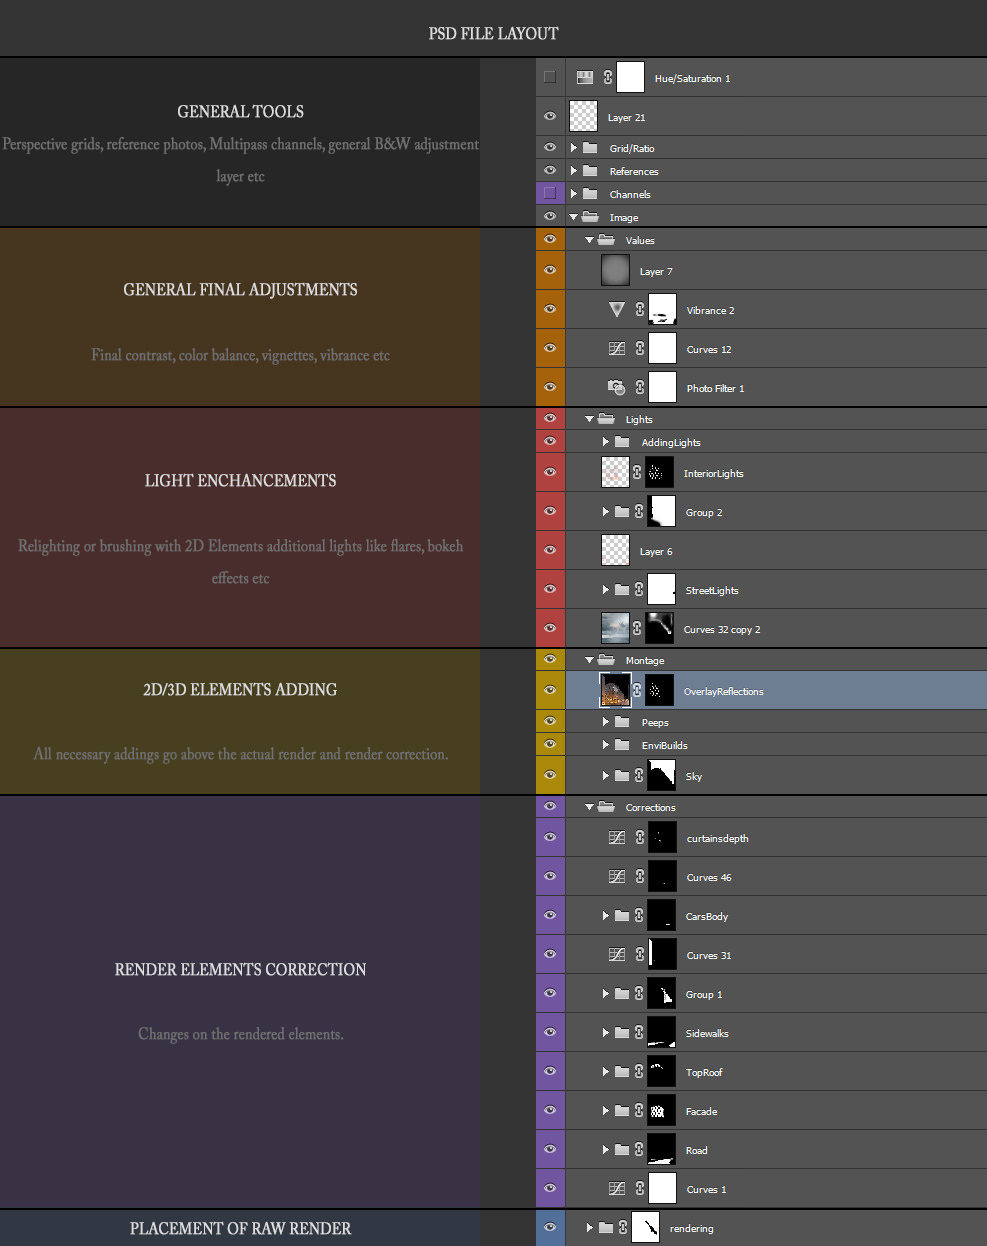
PSD File Layout
Now, this is my personal way of organising a PSD file. I managed to work for a long time like this so now I cannot really change it much. It is helpful, well organised and it can help you out in really big files.
The Process
The image was rendered at 5K resolution, along with channels I always use (Mat ID, Alpha, Reflection, Diffuse etc.). Here is the Raw render and all the channels I used for this one.
Below I’m attaching the Raw Render and a couple of channels I use almost 100% of the times.

Correcting Render Elements
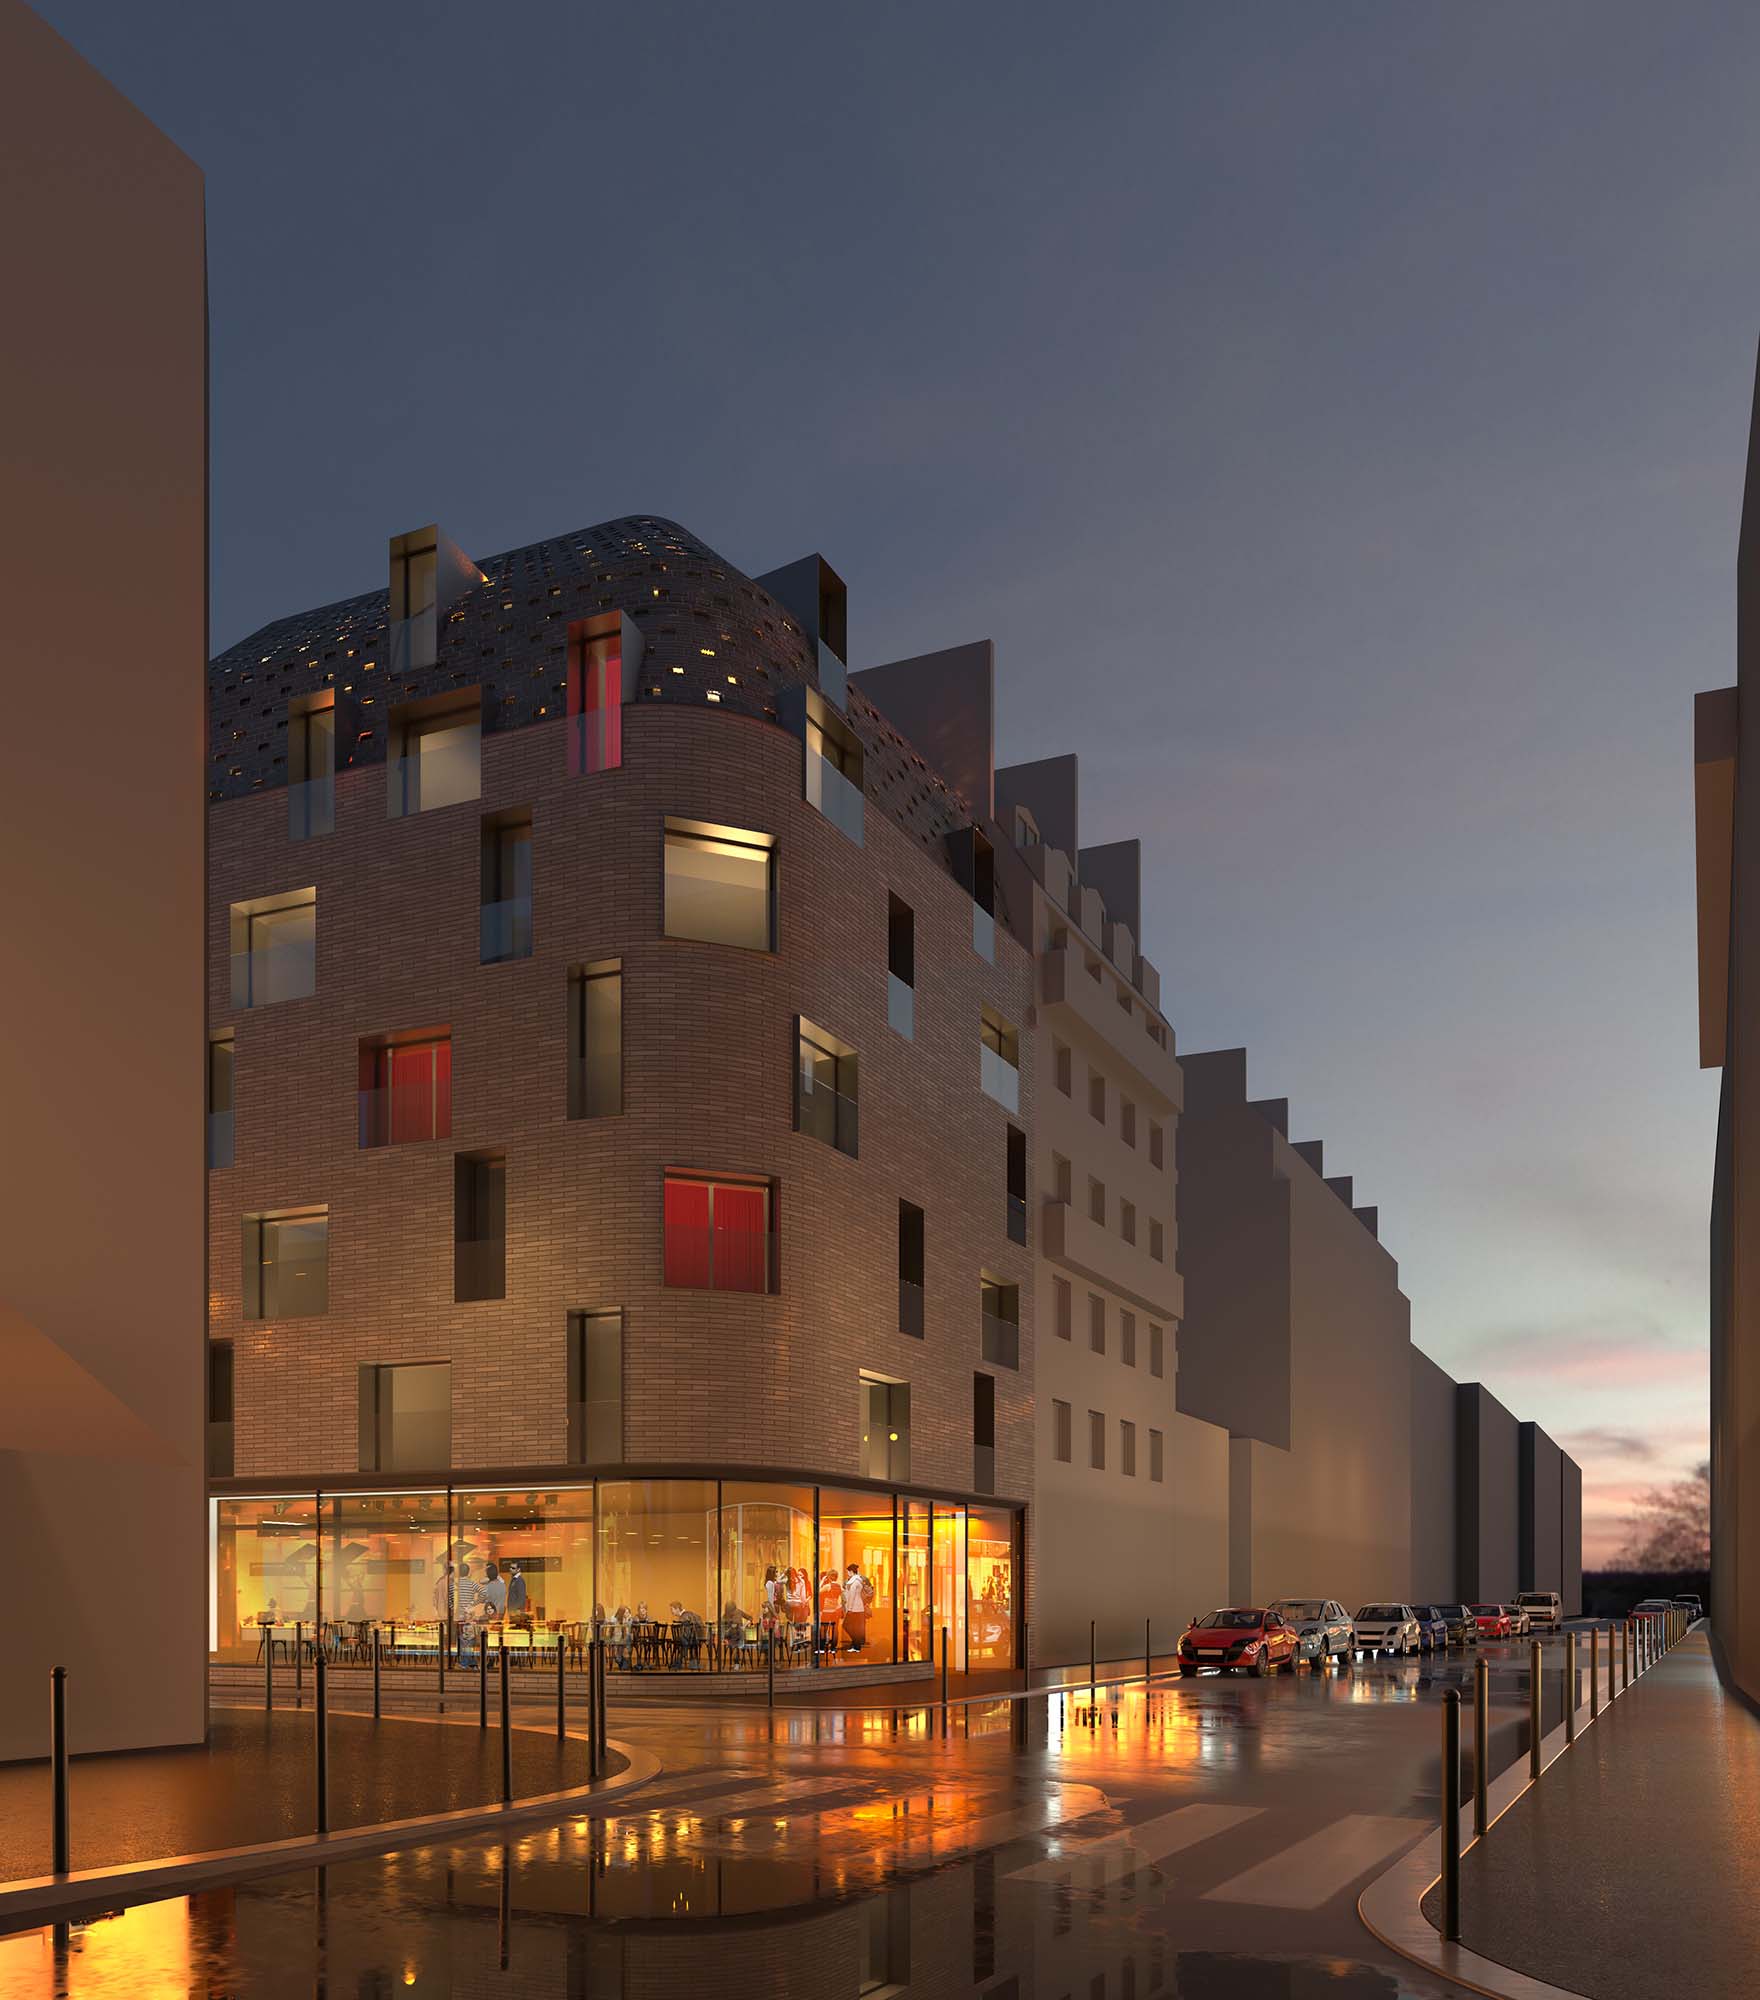
Starting from the render, I had to bring the facade and the street on the level I wanted it.
Checking contrast and values is just one basic first step. I had to make the brick facade more reflective due to demand and also bring it to a more whitish color.
Also, as in the reference image, the street had to be fixed too… Just a bit to match my reference image.

Constructing 2D/3D Elements –
So, Starting from the most important…
The Sky
Skies are the first thing I try to solve. A solid ground/sky pairing is essential to every project.
In this case, a slight moody bright sky, not to vibrant or blue, was the key.
The Hotel 114 is a new design, so I had to place it in the real environment as it is now. Here you can see the site as it is now.
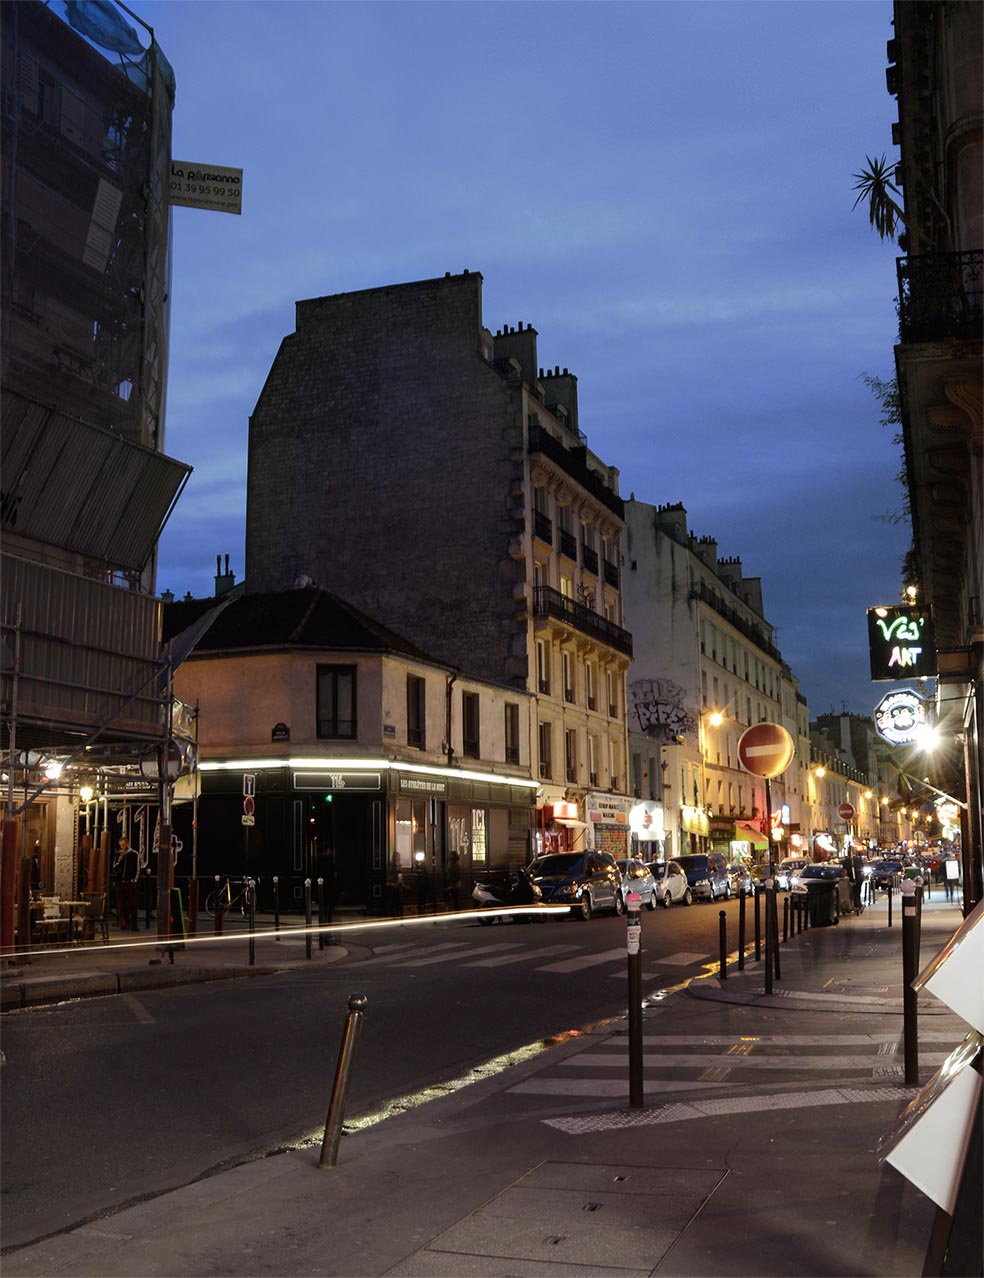
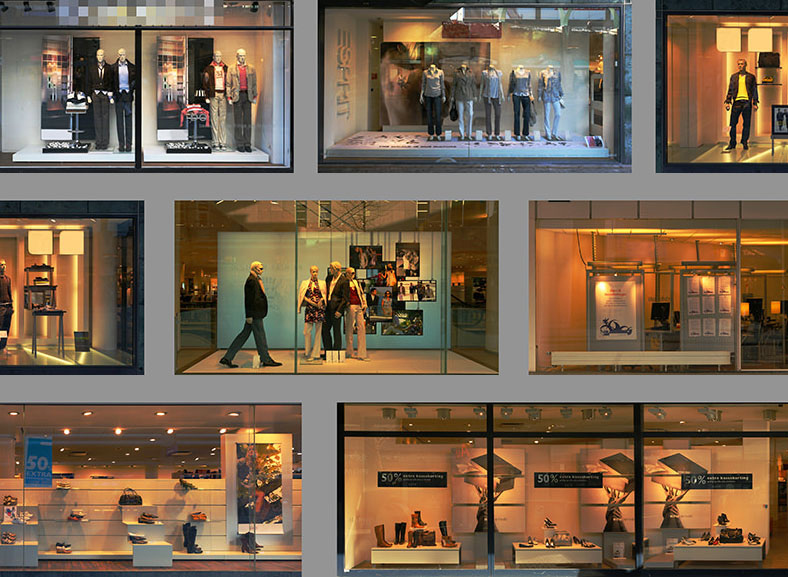
Also, I had to break the 2d buildings information in three levels, cause it seemed a lot easier to bring scale and correct positioning. I used a variety of photos the Architect’s team provided me with, to benefit as much as possible from resolution and avoid blurry or low-res images.

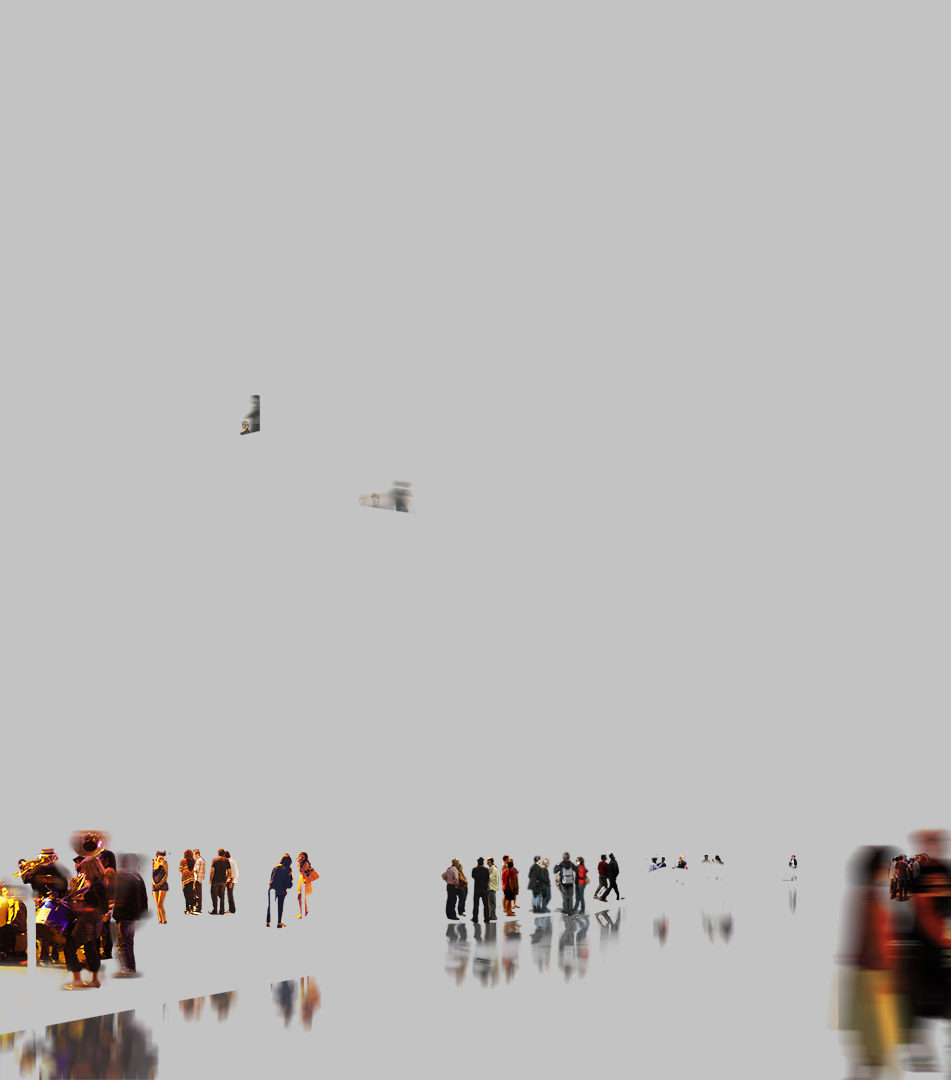
Finally, 2D-people
Finding and placing people is the most time-consuming thing for me. But, they help create the scenario and bring dynamic feel, along with contrast and color to the scene.
Essential to the image, making it great if done right… or ruin it otherwise!
Reflections on the wet road were done by flattening all people in the end, stamping them with a rotated stamp brush and smudging a bit to give noise from the water waves and the asphalt noisy surface.
Light Enhancements
After all the 2D Montages, the light enhancement always brings the final image a lot closer to being realistic. Usually, working with a combination of layers on screen mode, I add ambience on my existing light sources.
You dont have to exaggerate. Usually i keep my brush opacity to 20% max and keep my colors not too vibrant. If you keep light brushes…the light in the end will be a lot more natural. So avoid doing this step in 5-10 minutes!
In this case, I added a bit more red ambiance on the street lights, along with some more yellow / orange light in the interior spaces.
I also brought a bit of blue towards the top of the building, simulating the sky reflection on the glossy bricks.
结束,希望观看后的小伙伴们能够有收获....
*CGahz.COM 收集整理,转载请注明来自CG爱好者网(www.cgahz.com)
上一篇:返回列表
下一篇:甜美肌理文字制作C4D教程